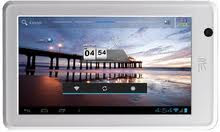
HCL ME U1 ROOT GUIDE
- This guide is successfully tested by me.
1. You need a 32 bit OS. (I have used 7 Pro x86).
2. Turn USB debugging ‘ON’ in settings of the tablet.
Then extract the zip file to desktop:\ & you will see 2 folders as “System” and “Meta-INF”.
4. Download the drivers. Then connect the tablet & install the drivers using device manager.
6. CONTINUE WITH THE FOLLOWING COMMANDS.
>adb root (you will see a message “adb is already running as a root”)
>adb devices (you should see your device number)
>adb shell (adb shell will run and daemon tool will also run if this message is not see then close elevated command prompt and restart tablet and continue with following commands)
7. NOW RESTART THE TABLET AND WAIT TILL THE HOME SCREEN APPEARS.NOW CONTINUE WITH FOLLOWING COMMANDS.
>adb shell getprop ro.secure (output should be 0)
>adb shell mount -oremount,rw /dev/block/system /system
>adb push c:\users/”username”/desktop/system/bin/su /system/bin/
>adb push c:\users/”username”/desktop/system/bin/su /system/_install/bin/
>adb shell chmod 4777 /system/bin/su
>adb shell mount -oremount,ro /dev/block/system /system
8. Open the new Superuser app just once.
9. Download apks of BusyBox, Google Play & Titanium Backup (Google is your friend!!).
10. Install BusyBox first, then check the rooting status with Titanium Backup. After that, install Google Play.
if any problem then contact me again.

